Running an OpenVole Server From Scratch
A complete, step-by-step walkthrough: install OpenVole, stand up the server, create your first agent, wire in the four essential paws — brain, session, memory, compact — and go through every section of the Config tab. By the end you’ll have a working, self-hosted agent you control end to end.
OpenVole (v4.3 as I write this) runs as a server. You start it once, and a single control-plane dashboard lets you create and operate any number of agents — each one an isolated space with its own config, paws, identity, and data. Everything runs on your machine, against whatever LLM you point it at. Here’s the whole path from nothing to a running agent.
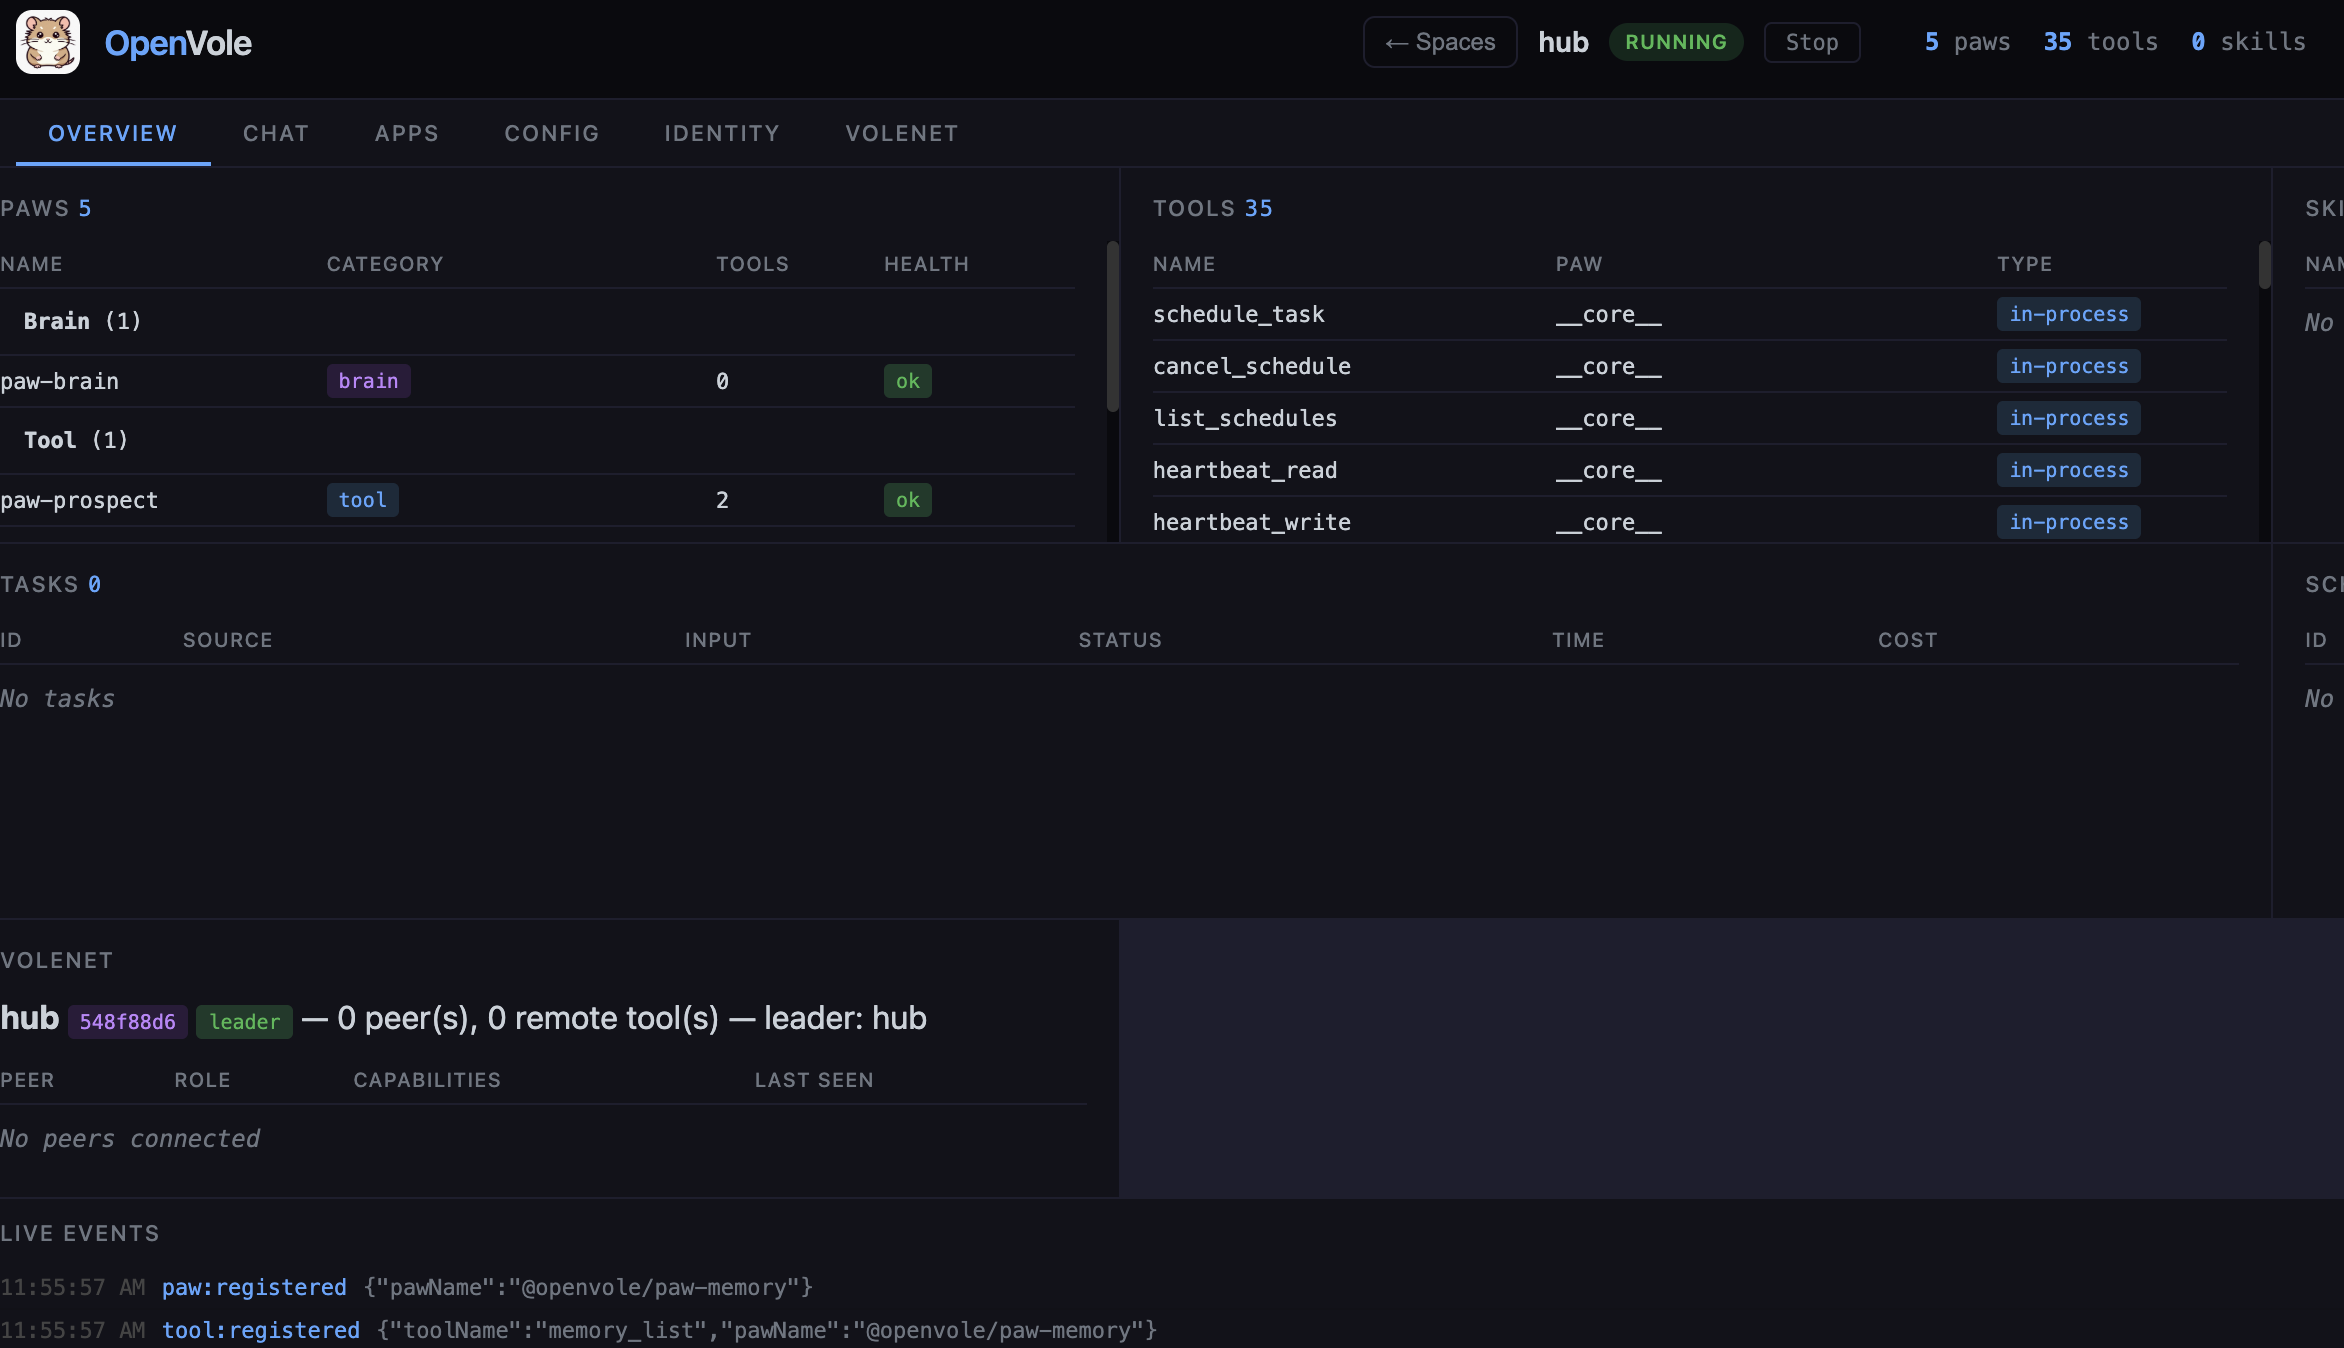 The
The openvole serve control plane: a running space’s Overview tab — its paws, tools, tasks, VoleNet status, and a live event stream, all in the browser.
1. Install
You need Node.js 20 or newer. Install the CLI globally:
npm install -g openvole@latest
openvole --version
Prefer not to install globally? Every command below also works with
npx openvole …. (voleis kept as an alias, butopenvoleis the canonical name.)
2. Start OpenVole server & create an agent root
Pick an empty directory to hold your agents. An empty directory becomes a new OpenVole root the first time you serve from it:
mkdir ~/my-agents && cd ~/my-agents
openvole serve
You’ll see something like:
OpenVole root: /Users/you/my-agents  (new)
Manage your spaces at http://localhost:3000/?token=8f3c…b1a9
A few things just happened, and they matter:
- The root is
~/my-agents. Your spaces live under~/my-agents/spaces/<name>/, and aspaces.jsonregistry tracks them. (To pin a fixed root from anywhere, setVOLE_HOME=~/my-agents.) - The dashboard is gated by a session token. As of v4.3 the control plane isn’t open just because you can reach the port — you need that
?token=…. It’s generated once and persisted at~/my-agents/.openvole/dashboard-token, so the URL stays stable across restarts. Override it withVOLE_DASHBOARD_TOKEN. - It binds all interfaces by default (
0.0.0.0) for convenience, but the token gates access. On a public box, restrict it:VOLE_DASHBOARD_HOST=127.0.0.1 openvole serve, and firewall or tunnel the port. Change the port withVOLE_DASHBOARD_PORT.
Open that tokenized URL in your browser and you’ve got the dashboard.
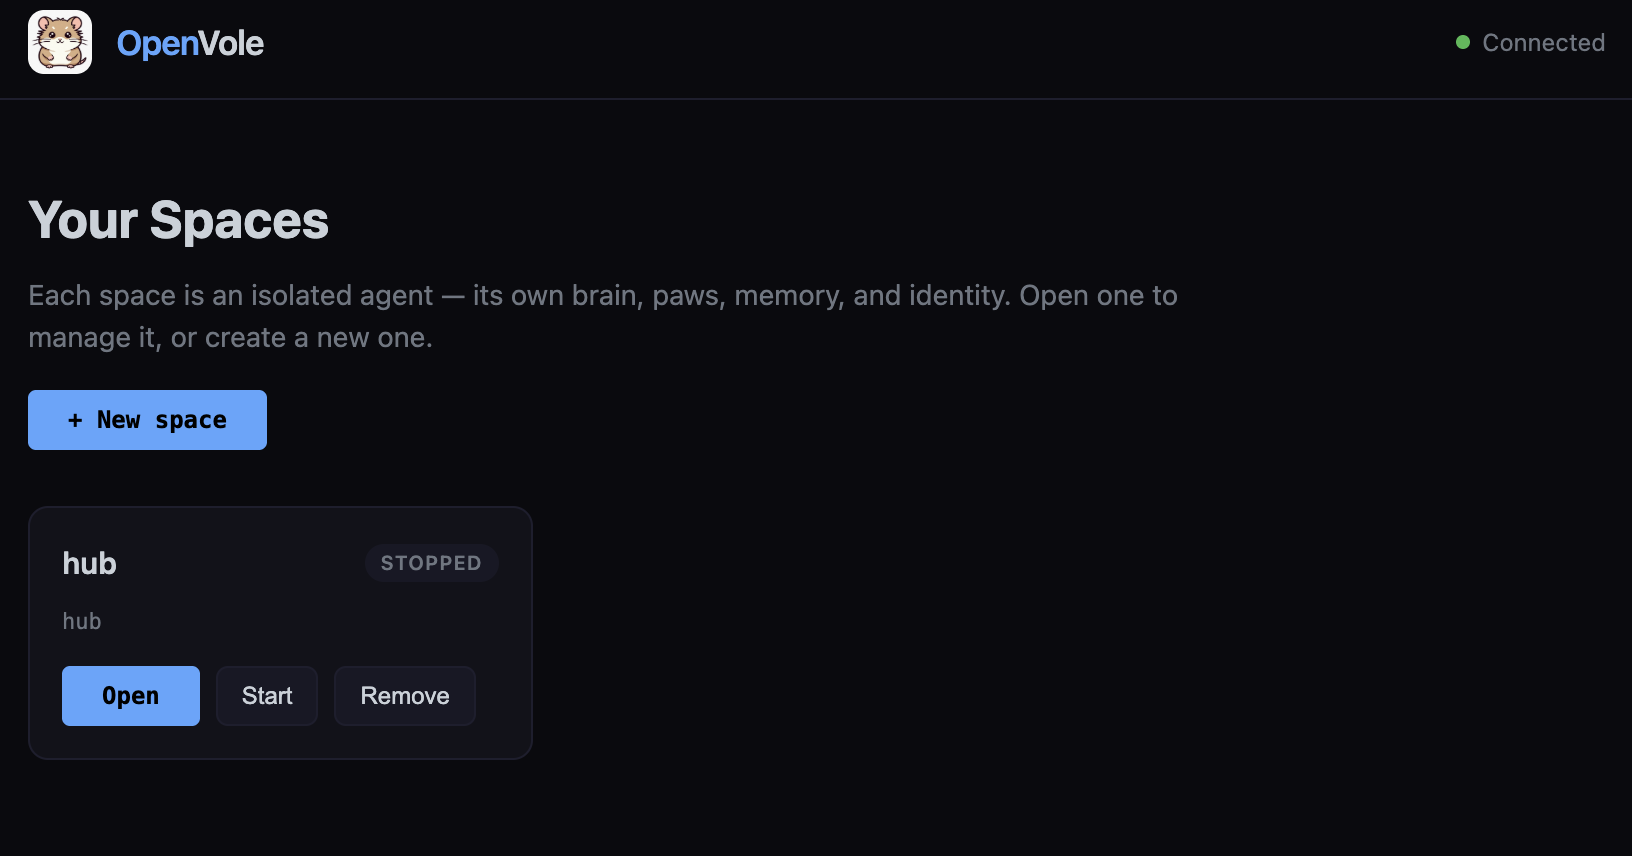 The dashboard opens to Your Spaces — each card is an isolated agent. Click New space to create one.
In a hurry? A preset does steps 2–4 for you:
curl -fsSL https://raw.githubusercontent.com/openvole/openvole/main/presets/basic.sh | bash. But doing it by hand once is worth it.
3. Create a space and add the essential paws
A fresh OpenVole install has zero capabilities — no LLM, no memory, no tools. That’s by design: the core is just the agent loop, and everything useful is a paw (a sandboxed plugin) you opt into.
In the dashboard, click New space, give it a name (assistant), and create it. The onboarding step that pops up offers the essentials, pre-checked:
@openvole/paw-brain@openvole/paw-session@openvole/paw-memory@openvole/paw-compact@openvole/paw-shell
Leave the four we care about checked and Install. Each paw is npm install-ed into the space’s own directory and registered in its vole.config.json. (You can add or remove paws later from the Config → Paws section, or from the space directory with openvole paw add <name>.)
4. Configure the brain (the .env)
The brain needs an LLM and a key, and secrets live on the server, not in the browser — so this one step happens in a file. A new space ships with a minimal .env (just logging). Open it:
$EDITOR ~/my-agents/spaces/assistant/.env
Add a provider and its key. @openvole/paw-brain is a single adapter that speaks to all the major providers — you choose with BRAIN_PROVIDER:
# --- pick ONE provider ---

# Local & free (no key) — needs Ollama running:
BRAIN_PROVIDER=ollama
OLLAMA_HOST=http://localhost:11434
OLLAMA_MODEL=qwen3:8b

# …or Anthropic:
# BRAIN_PROVIDER=anthropic
# ANTHROPIC_API_KEY=sk-ant-...
# ANTHROPIC_MODEL=claude-sonnet-4-6     # optional

# …or OpenAI:
# BRAIN_PROVIDER=openai
# OPENAI_API_KEY=sk-...

# …or Gemini:
# BRAIN_PROVIDER=gemini
# GEMINI_API_KEY=...
If you don’t set BRAIN_PROVIDER, the brain auto-detects one from whichever API key is present. You can also set a fallback (BRAIN_FALLBACK=openai, etc.) that kicks in if the primary provider errors. For a dry run with no LLM at all, BRAIN_PROVIDER=mock gives deterministic canned replies.
The four essential paws, and what each one does
These four are what turn the bare loop into a real assistant:
paw-brain— the Think step. The core is LLM-ignorant; the brain is the paw that actually calls the model and turns context into a plan. One unified adapter, five real providers (Anthropic, OpenAI, Gemini, Ollama, xAI) plusmock, with optional fallback. Configured entirely through the env vars above.paw-session— conversation transcripts. Records each session’s messages and metadata toVOLE_SESSION_DIR(defaults under.openvole/). It’s what powers the Chat tab’s history and lets a conversation persist across restarts. Tools:session_history,session_list,session_clear. OptionalVOLE_SESSION_TTLages old sessions out.paw-memory— persistent long-term memory. Markdown-based memory the agent reads and writes across runs, with hybrid search: keyword (BM25) plus vector similarity when you give it an embedding provider. SetVOLE_EMBEDDING_PROVIDER=ollama(oropenai/gemini) to enable semantic recall; without it, memory degrades gracefully to keyword-only. Tools:memory_read,memory_write,memory_search,memory_list.paw-compact— context compaction. When a task’s history approaches the context budget, this summarizes the old messages so the loop keeps going instead of overflowing. By default it’s a free heuristic; setVOLE_COMPACT_MODELto use an LLM for higher-quality summaries, andVOLE_COMPACT_KEEP_RECENTto control how many recent messages stay verbatim. No tools — it runs as anonCompacthook.
5. Walk through the Config tab
Select your space in the dashboard and open Config. Everything in vole.config.json is editable here as structured form fields — no hand-editing JSON. The sections:
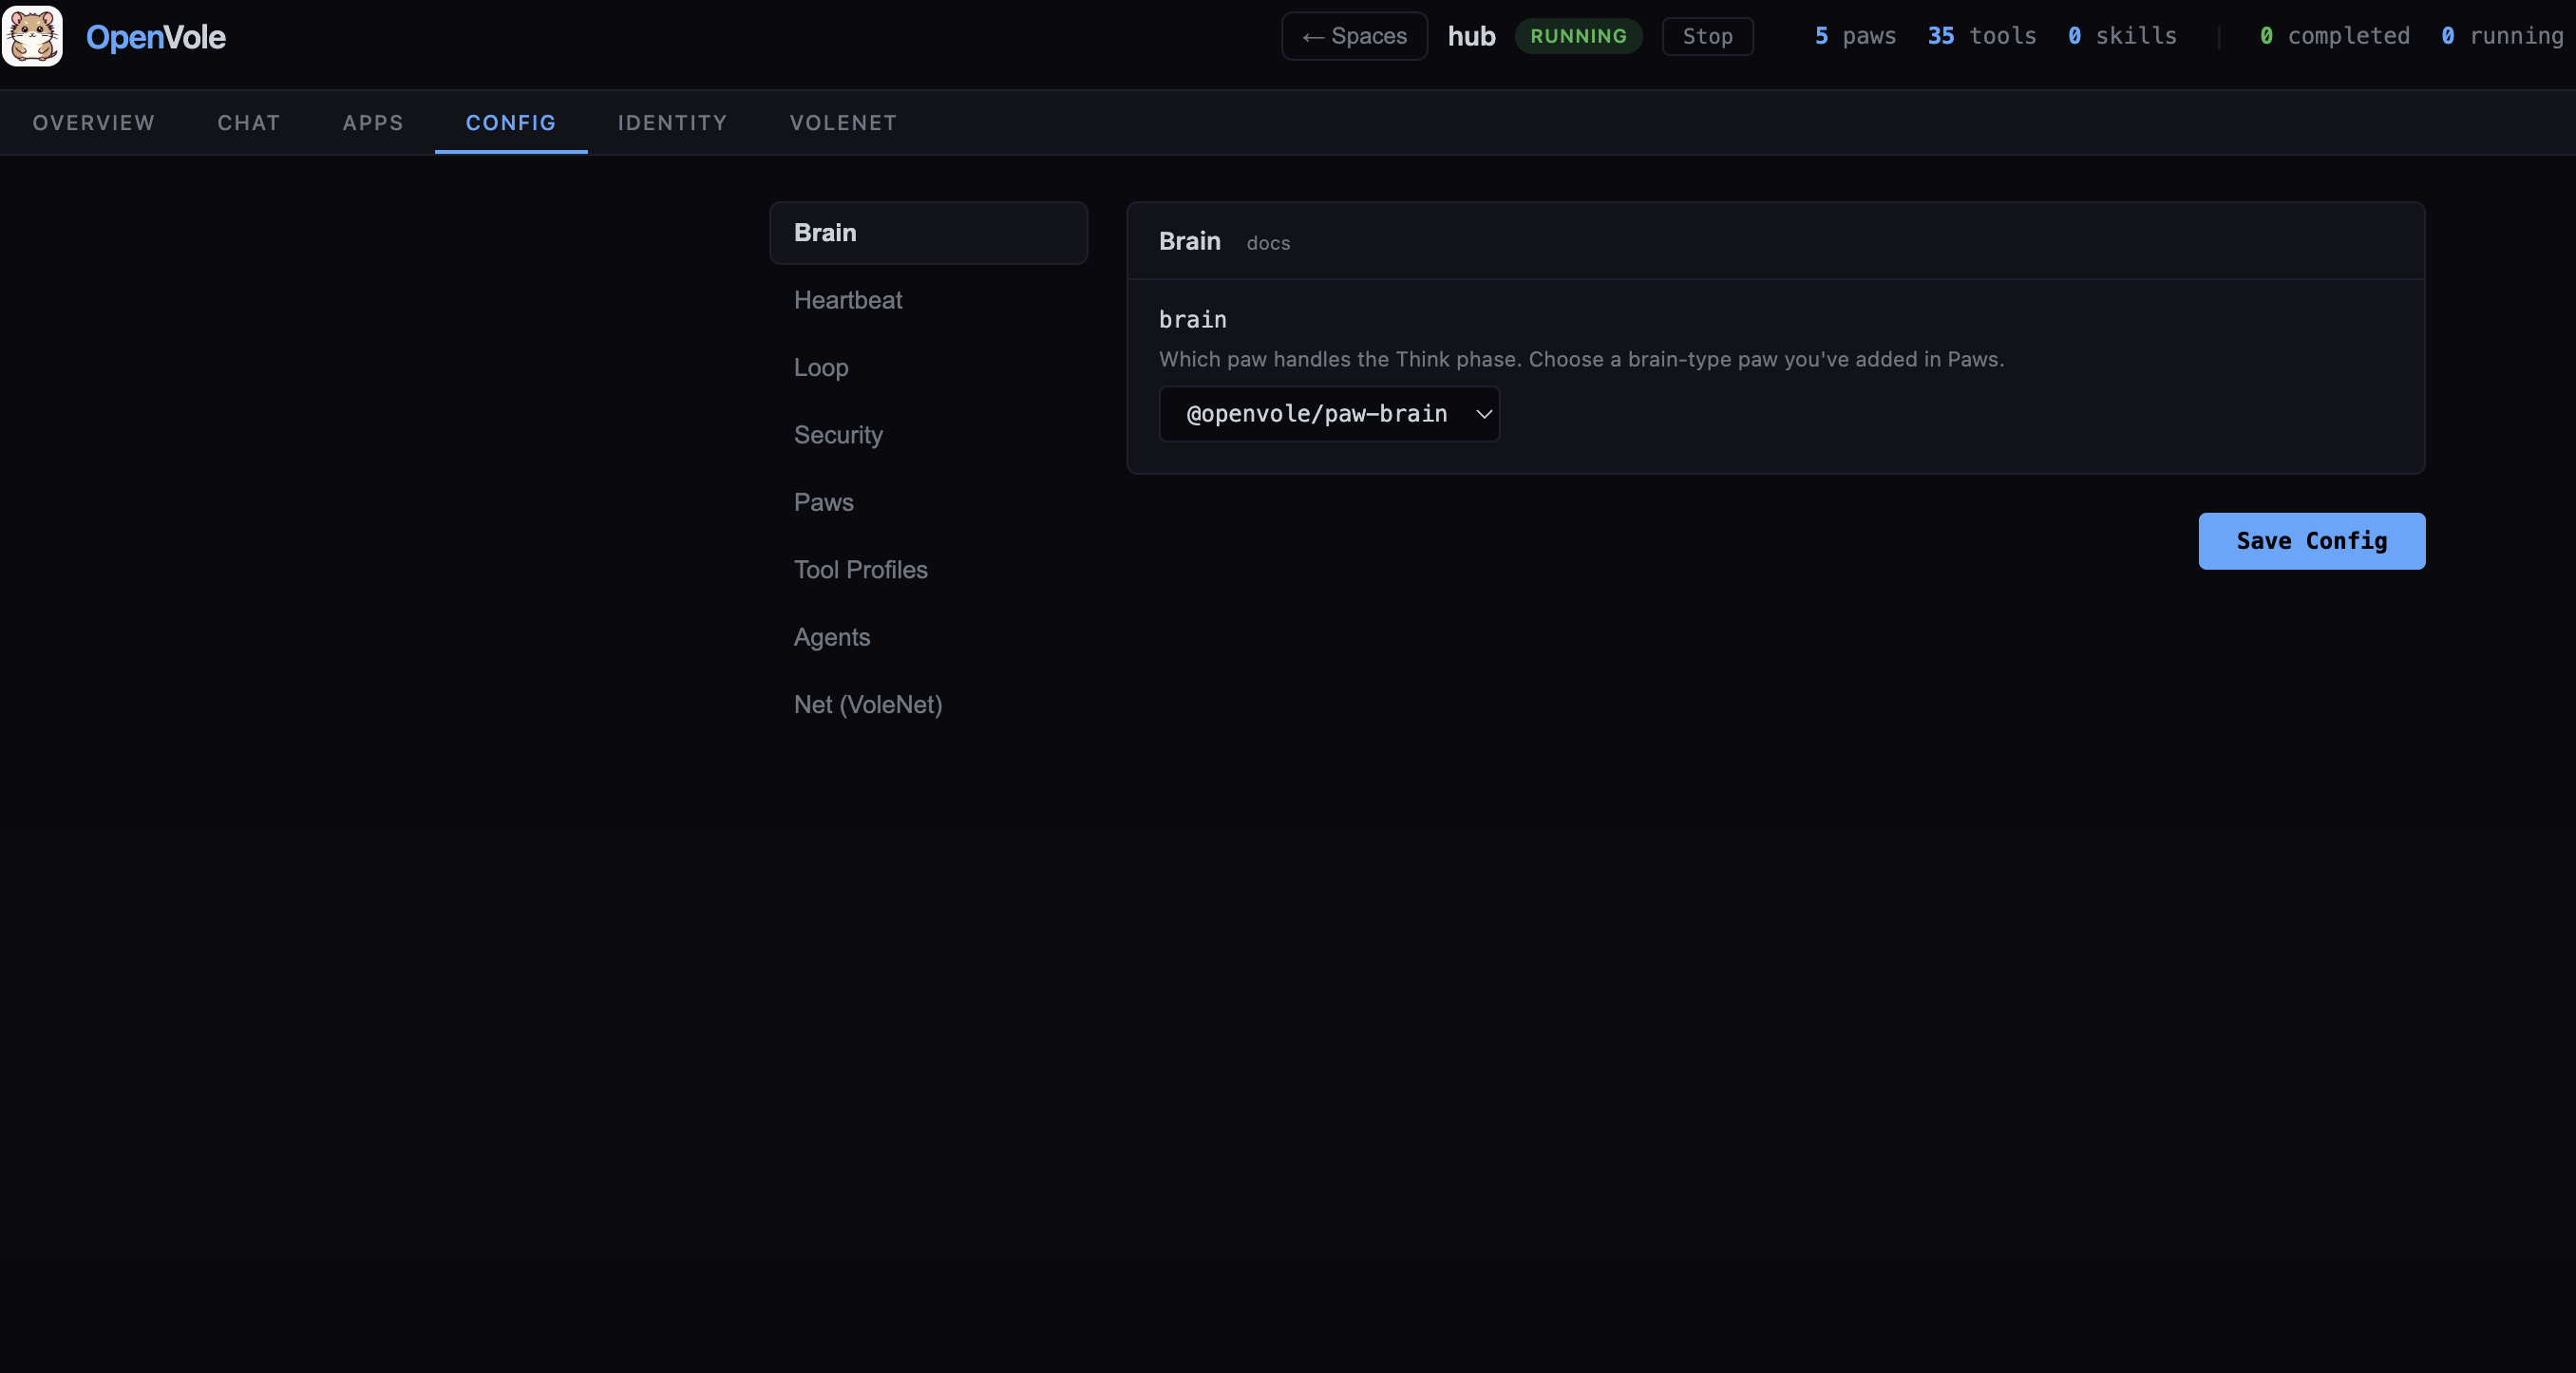 The Config tab: every part of
 vole.config.json as a structured form — the left nav lists Brain, Heartbeat, Loop, Security, Paws, Tool Profiles, Agents, and Net (VoleNet); here the Brain dropdown is set to @openvole/paw-brain.
- Brain — a dropdown of the installed brain-type paws. Pick
@openvole/paw-brain. (This is the single most important setting; without it the Think step is a no-op.) - Heartbeat —
enabled,intervalMinutes,runOnStart. For an on-demand assistant, leave it off. Turn it on to give the agent a recurring “wake up and check things” tick. - Loop — the agent loop’s knobs:
maxIterations,taskConcurrency,compactThreshold(the % of the context budget that triggers paw-compact),toolHorizon,maxContextTokens(set this to your model’s window),responseReserve, andcostTracking/costAlertThreshold. There’s alsorateLimits(LLM calls per minute/hour, tool executions per task). The defaults are sane — the one worth checking ismaxContextTokens. - Security —
sandboxFilesystem(keep it on), globalallowedPaths, and per-paw filesystem paths. By default a paw can only read its own package, its own data dir,node_modules, and the temp dir — nothing else. Note: for safety the dashboard refuses to weaken the sandbox (turning it off, or broadeningallowedPaths) — those changes require deliberately editingvole.config.jsonon the server. - Paws — the installed paws with their permissions, plus a browser to add more from the official catalog.
- Tool Profiles — per-source allow/deny lists. Restrict which tools a given task source (CLI, a channel, a peer) may call.
- Agents — named sub-agent profiles (role, instructions,
allowTools/denyTools,maxIterations) that the brain can spawn for sub-tasks. - Net (VoleNet) — off by default. Flip the toggle to connect this instance into a peer-to-peer mesh — sharing tools, memory, and even the brain across machines (peers,
share, TLS,hostname, connection/rate limits, public-join). A topic for its own post.
Hit Save, then Restart the space so the new config (and your .env) takes effect.
6. Start it and chat
Back on the space, click Start. The control plane launches the space’s engine as its own process (its logs land in ~/my-agents/spaces/assistant/.openvole/logs/vole.log). Open the Chat tab and talk to it. Ask it to remember something, then in a later session ask it to recall — that round-trip exercises the brain, session, memory, and compaction all at once.
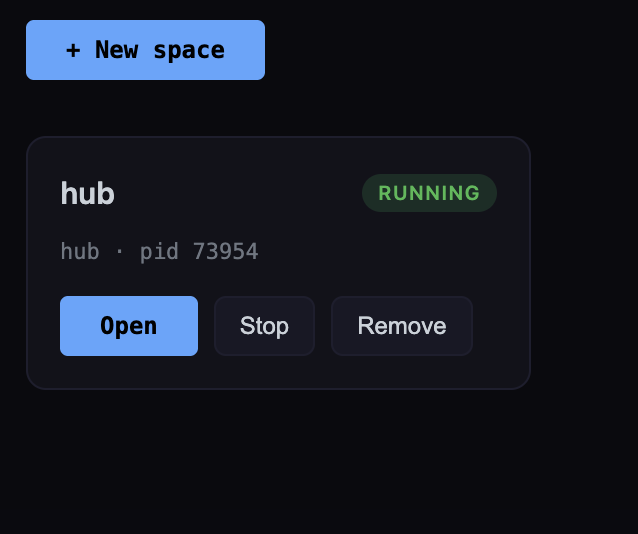
Click Start and the space flips to RUNNING (with its process id) — its engine is now live in its own process.
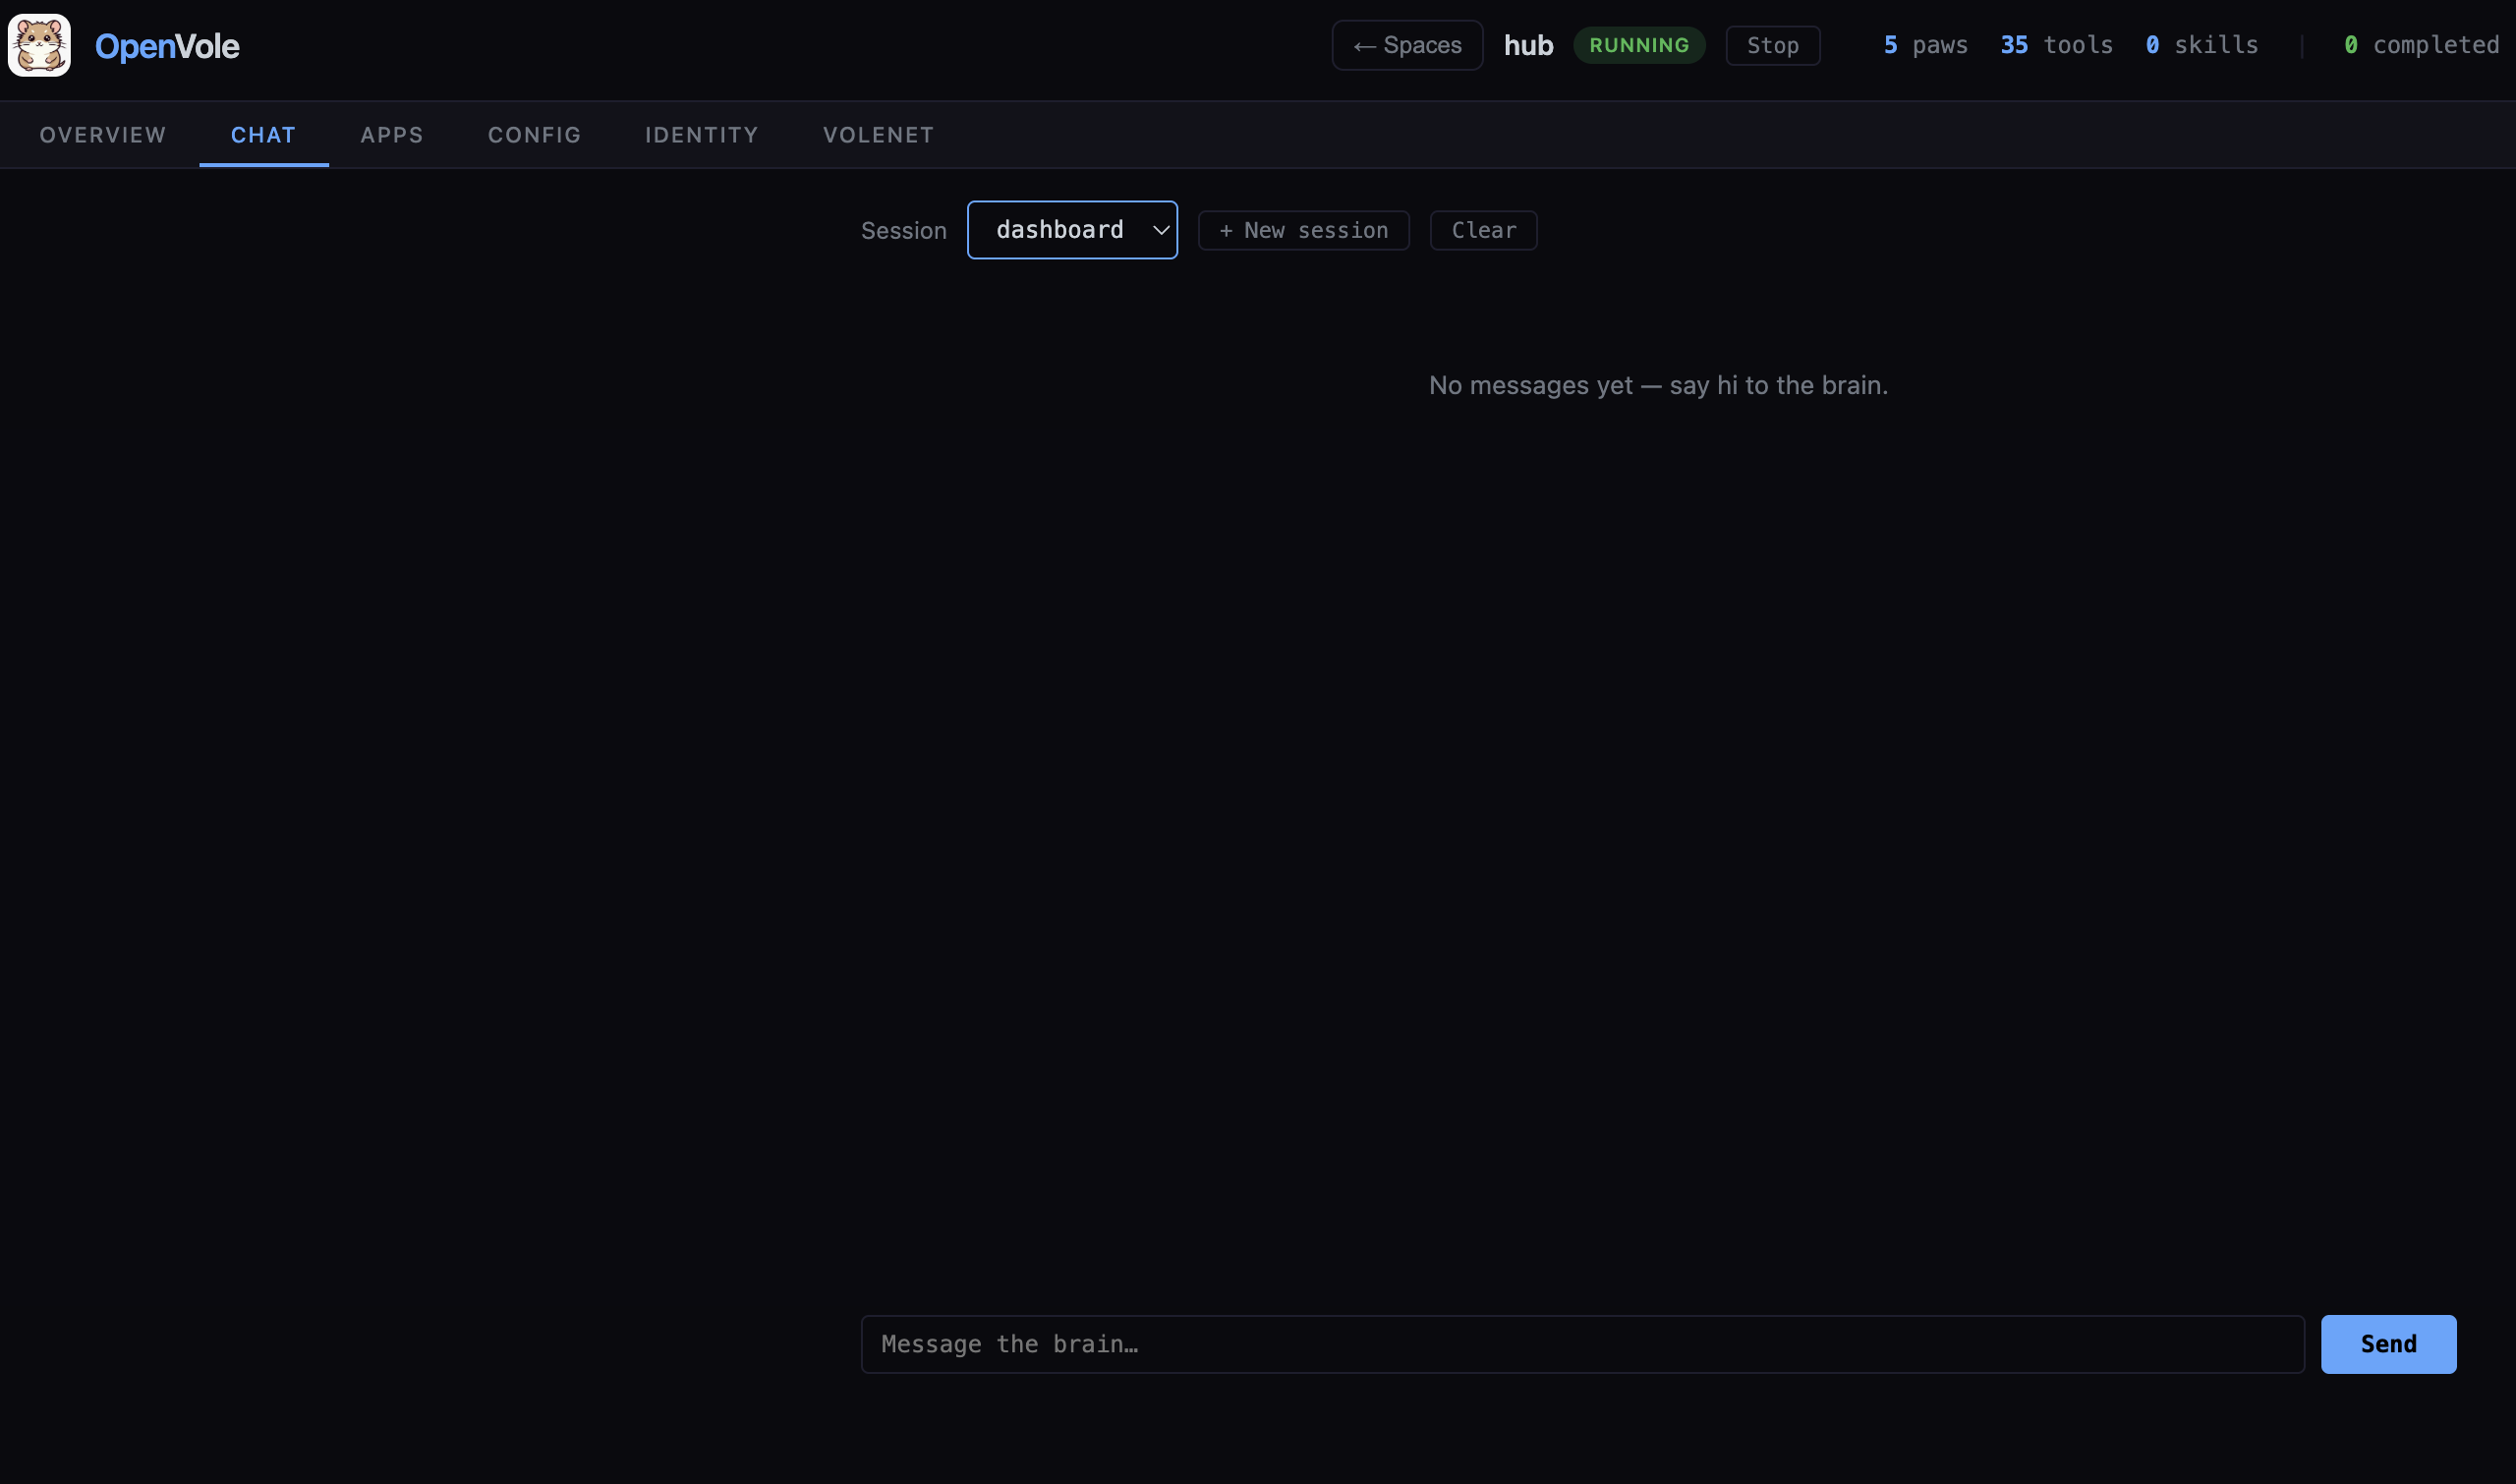 The Chat tab — talk to the space’s brain directly, with per-session history.
That’s the whole loop
You installed one binary, turned an empty folder into a server, created an isolated agent, gave it a brain and memory, and configured it — all self-hosted, with your keys in a file you own and the dashboard behind a token. From here the interesting part is the edges: more paws, agents that spawn sub-agents, embedded-app paws under the Apps tab, and meshing instances together with VoleNet.
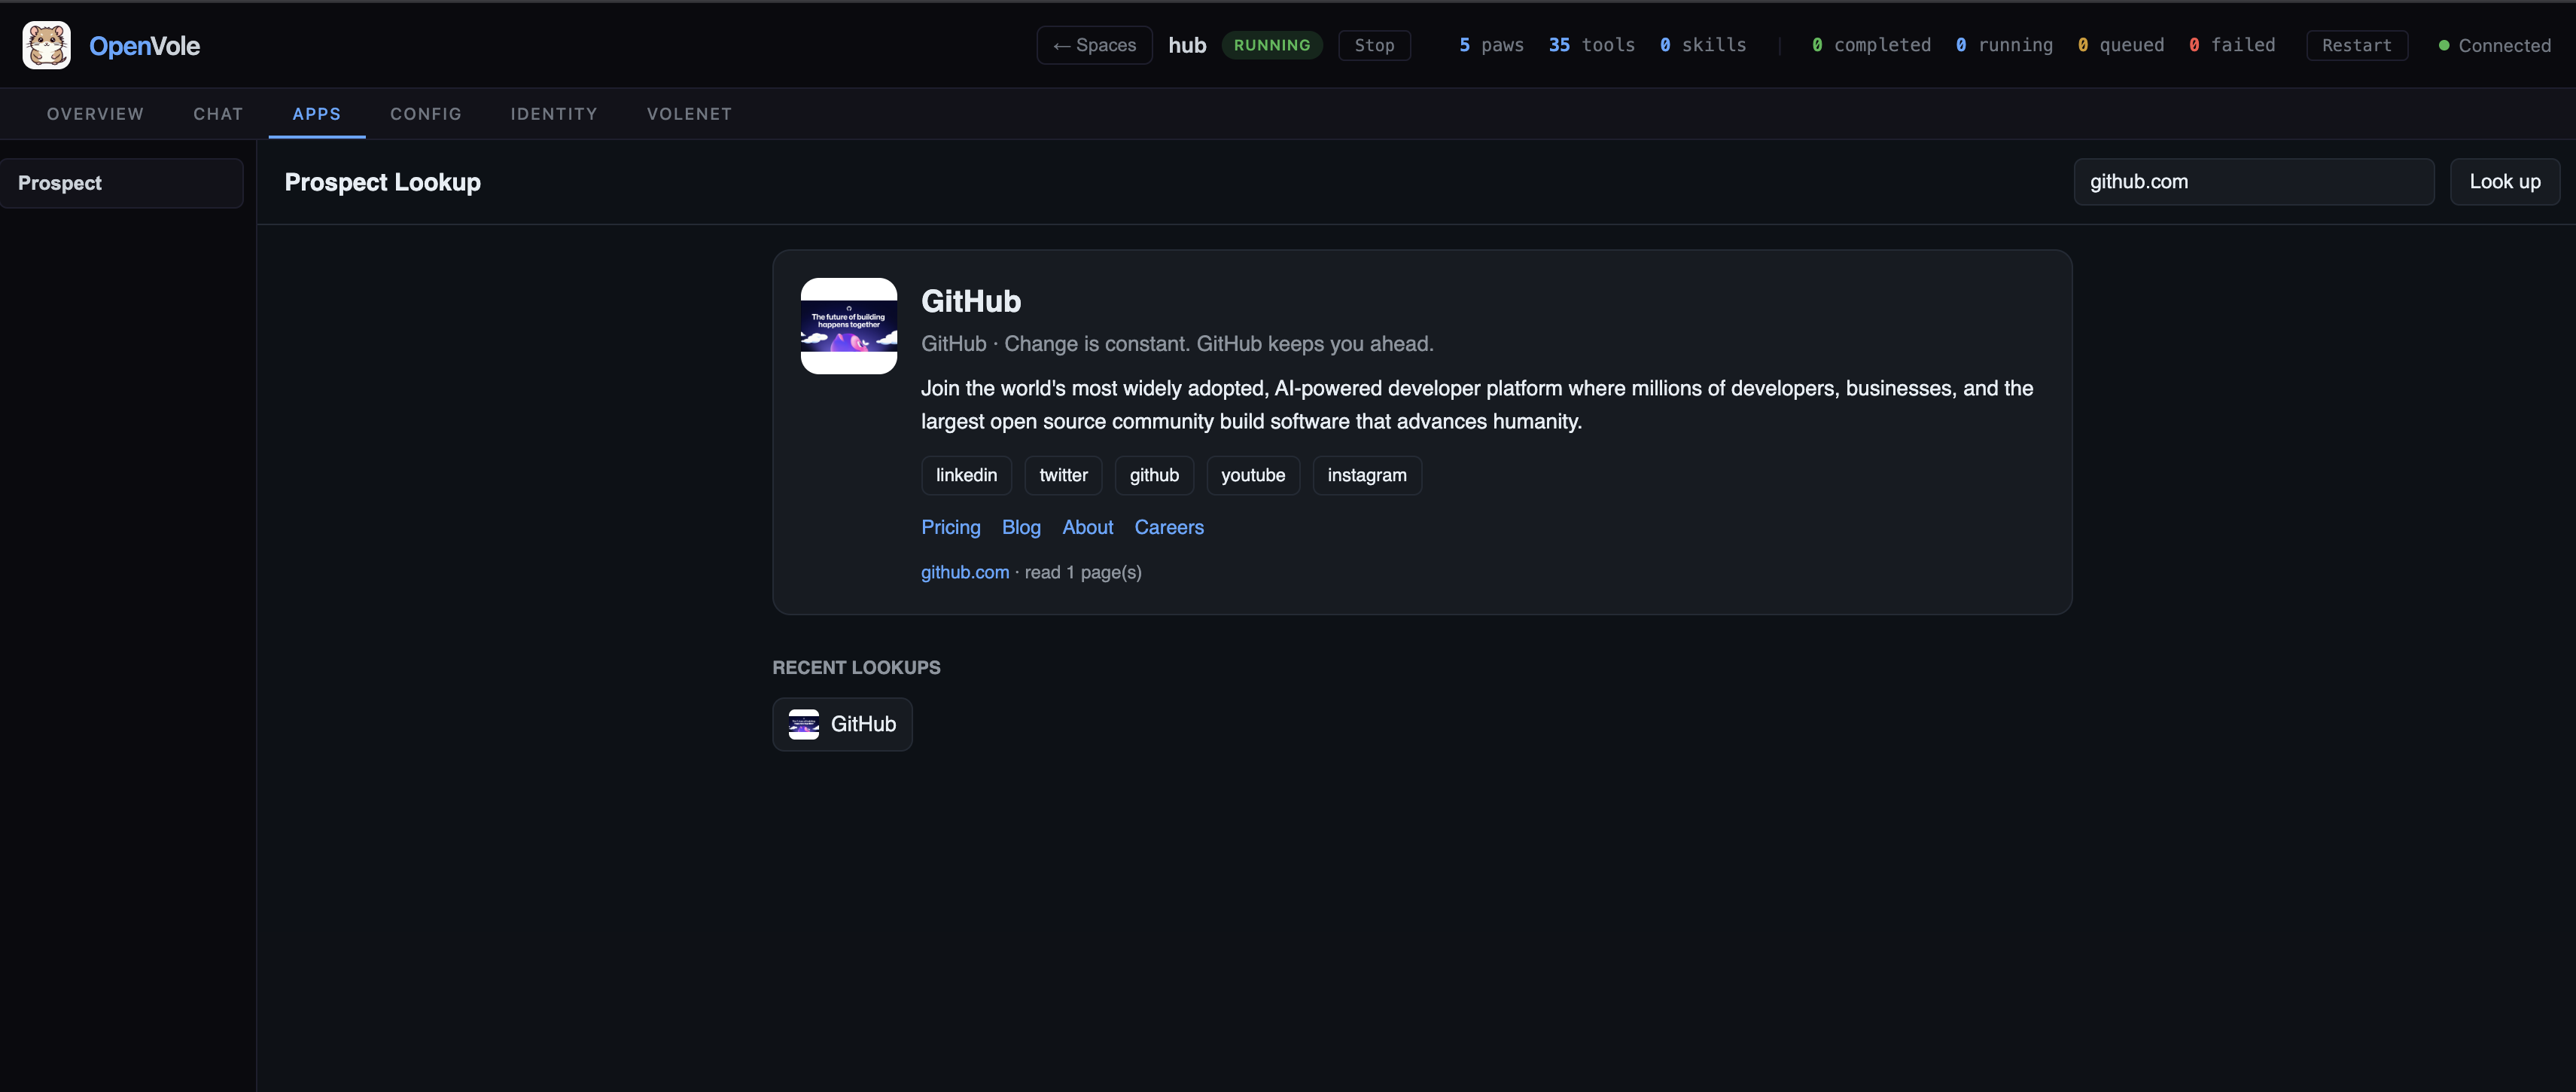 The Apps tab — a paw’s own UI embedded right in the dashboard (here, a Prospect Lookup panel), served through the control plane with no extra port.
OpenVole now runs as an AI agent OS which can serve multiple Vole agent instances that we call them as spaces in one server. Each space acts as independent AI agent, has its own isolated Vole config, paws and VoleNet interface if enabled. Local Vole spaces can connect to the same VoleNet mesh as well.
Comments & reactions